Creating a Custom Mantra Renderer Preset in Houdini
Over the years I've always tried to make some of the more utilitarian processes as efficient as possible, so I can spend more time creating the work. Such is the case when exporting / rendering work out of Houdini. I don't want to have to keep changing the settings when I first go to render a project out. Handily Houdini lets you save presets very easily, yet there is a way to make these even more bespoke for your needs. Here's how.
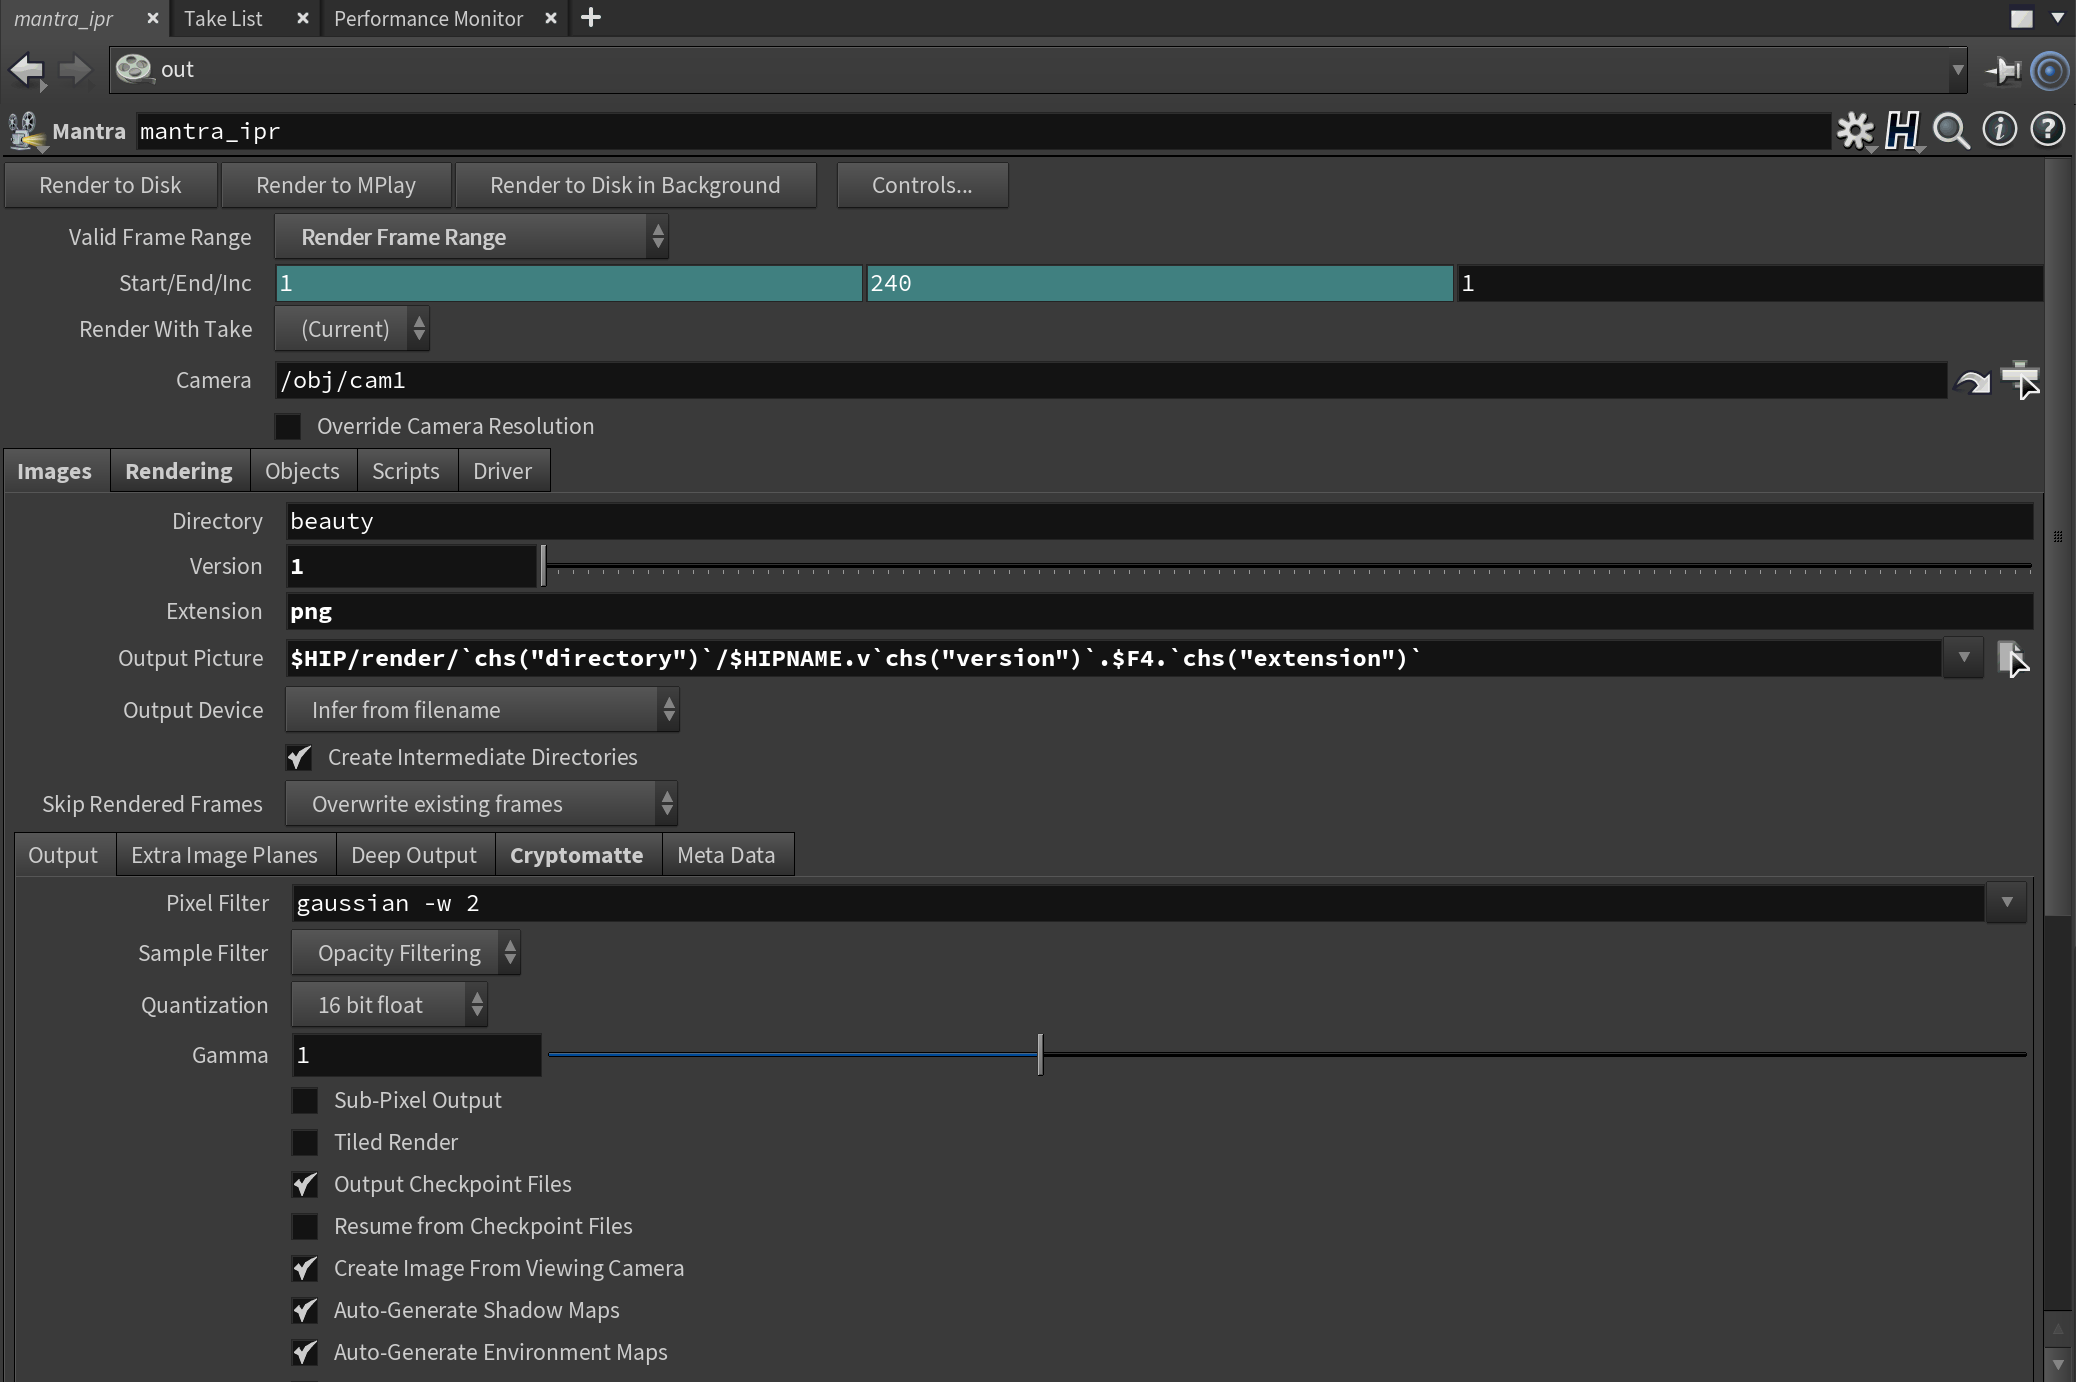
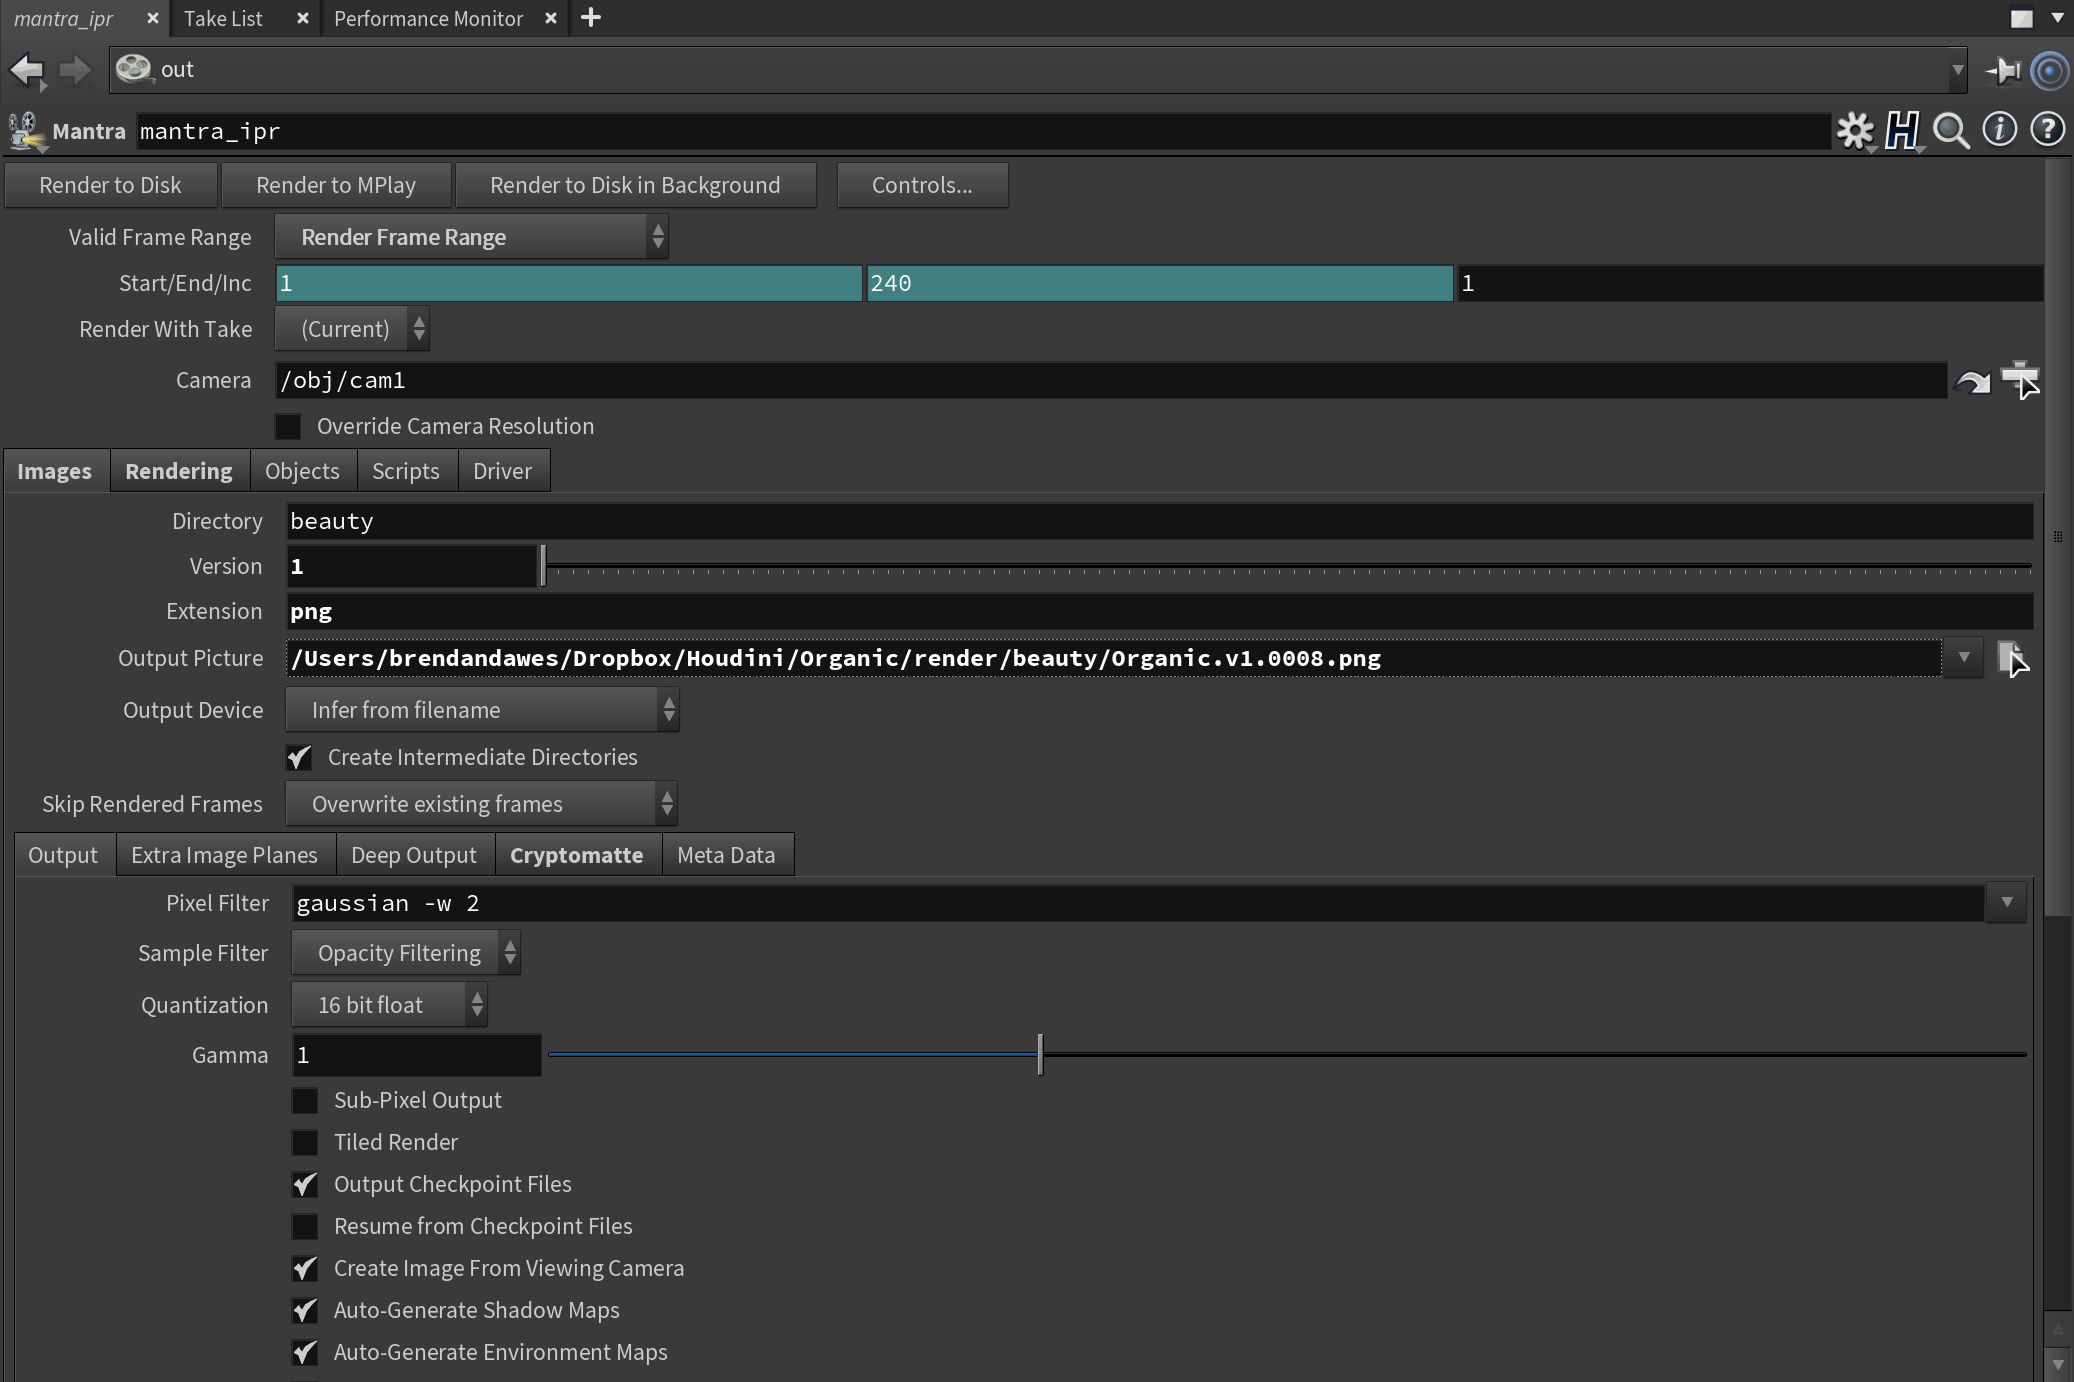
Below you can see my main export preset. The eagle-eyed amongst you will spot a few extra fields which don't come as standard, namely Directory, Version and Extension. This allows me to set a directory for the output, a version number if I need one and finally an image format (PNG, EXR, etc) without having to mess with the output filename field as it all gets evaluated automatically as you can see in the second image.
To create something similar, click the cog icon in the top right corner and choose Edit Parameter Interface.

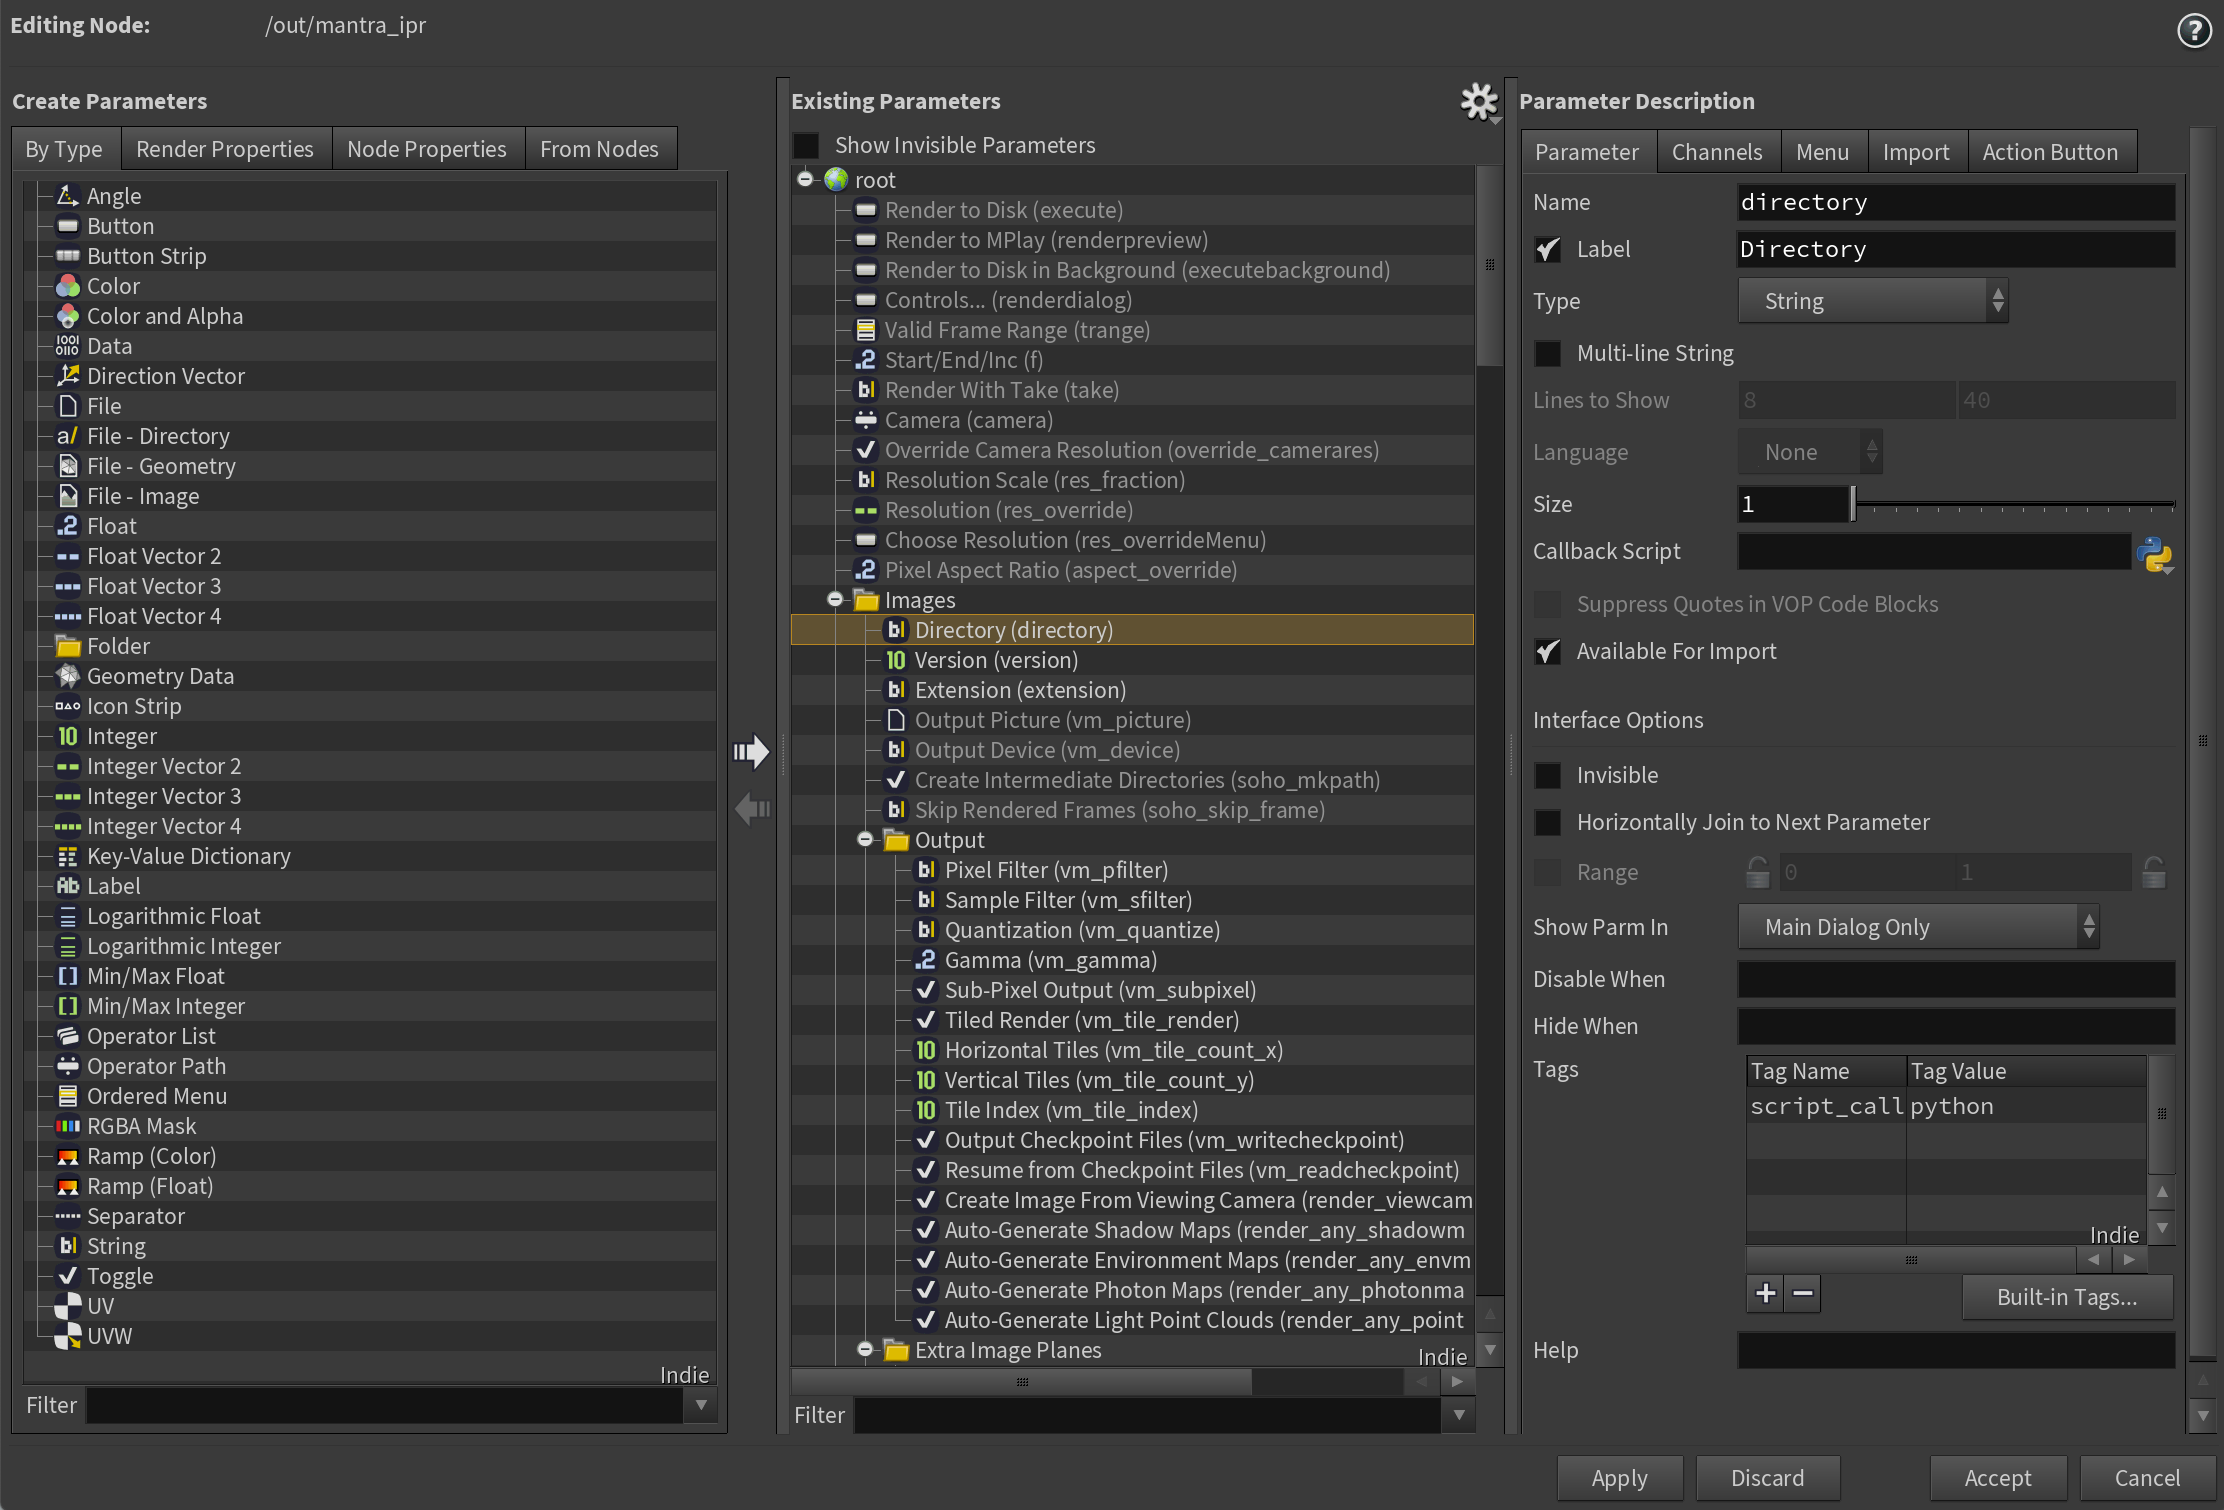
This will show the parameter interface dialog were you can edit the interface to your liking.
From the left hand side drag in a String field and place it into the Images section of the interface settings. Name it how you want, both in the label field and the name field. Add any other settings you see fit, such as a version slider, or another String field for an extension or whatever else. When you're happy click Accept and Apply.
To add each of these so they create the directory and filename structure of your output, right-click inside each of these new fields and choose Copy Parameter.
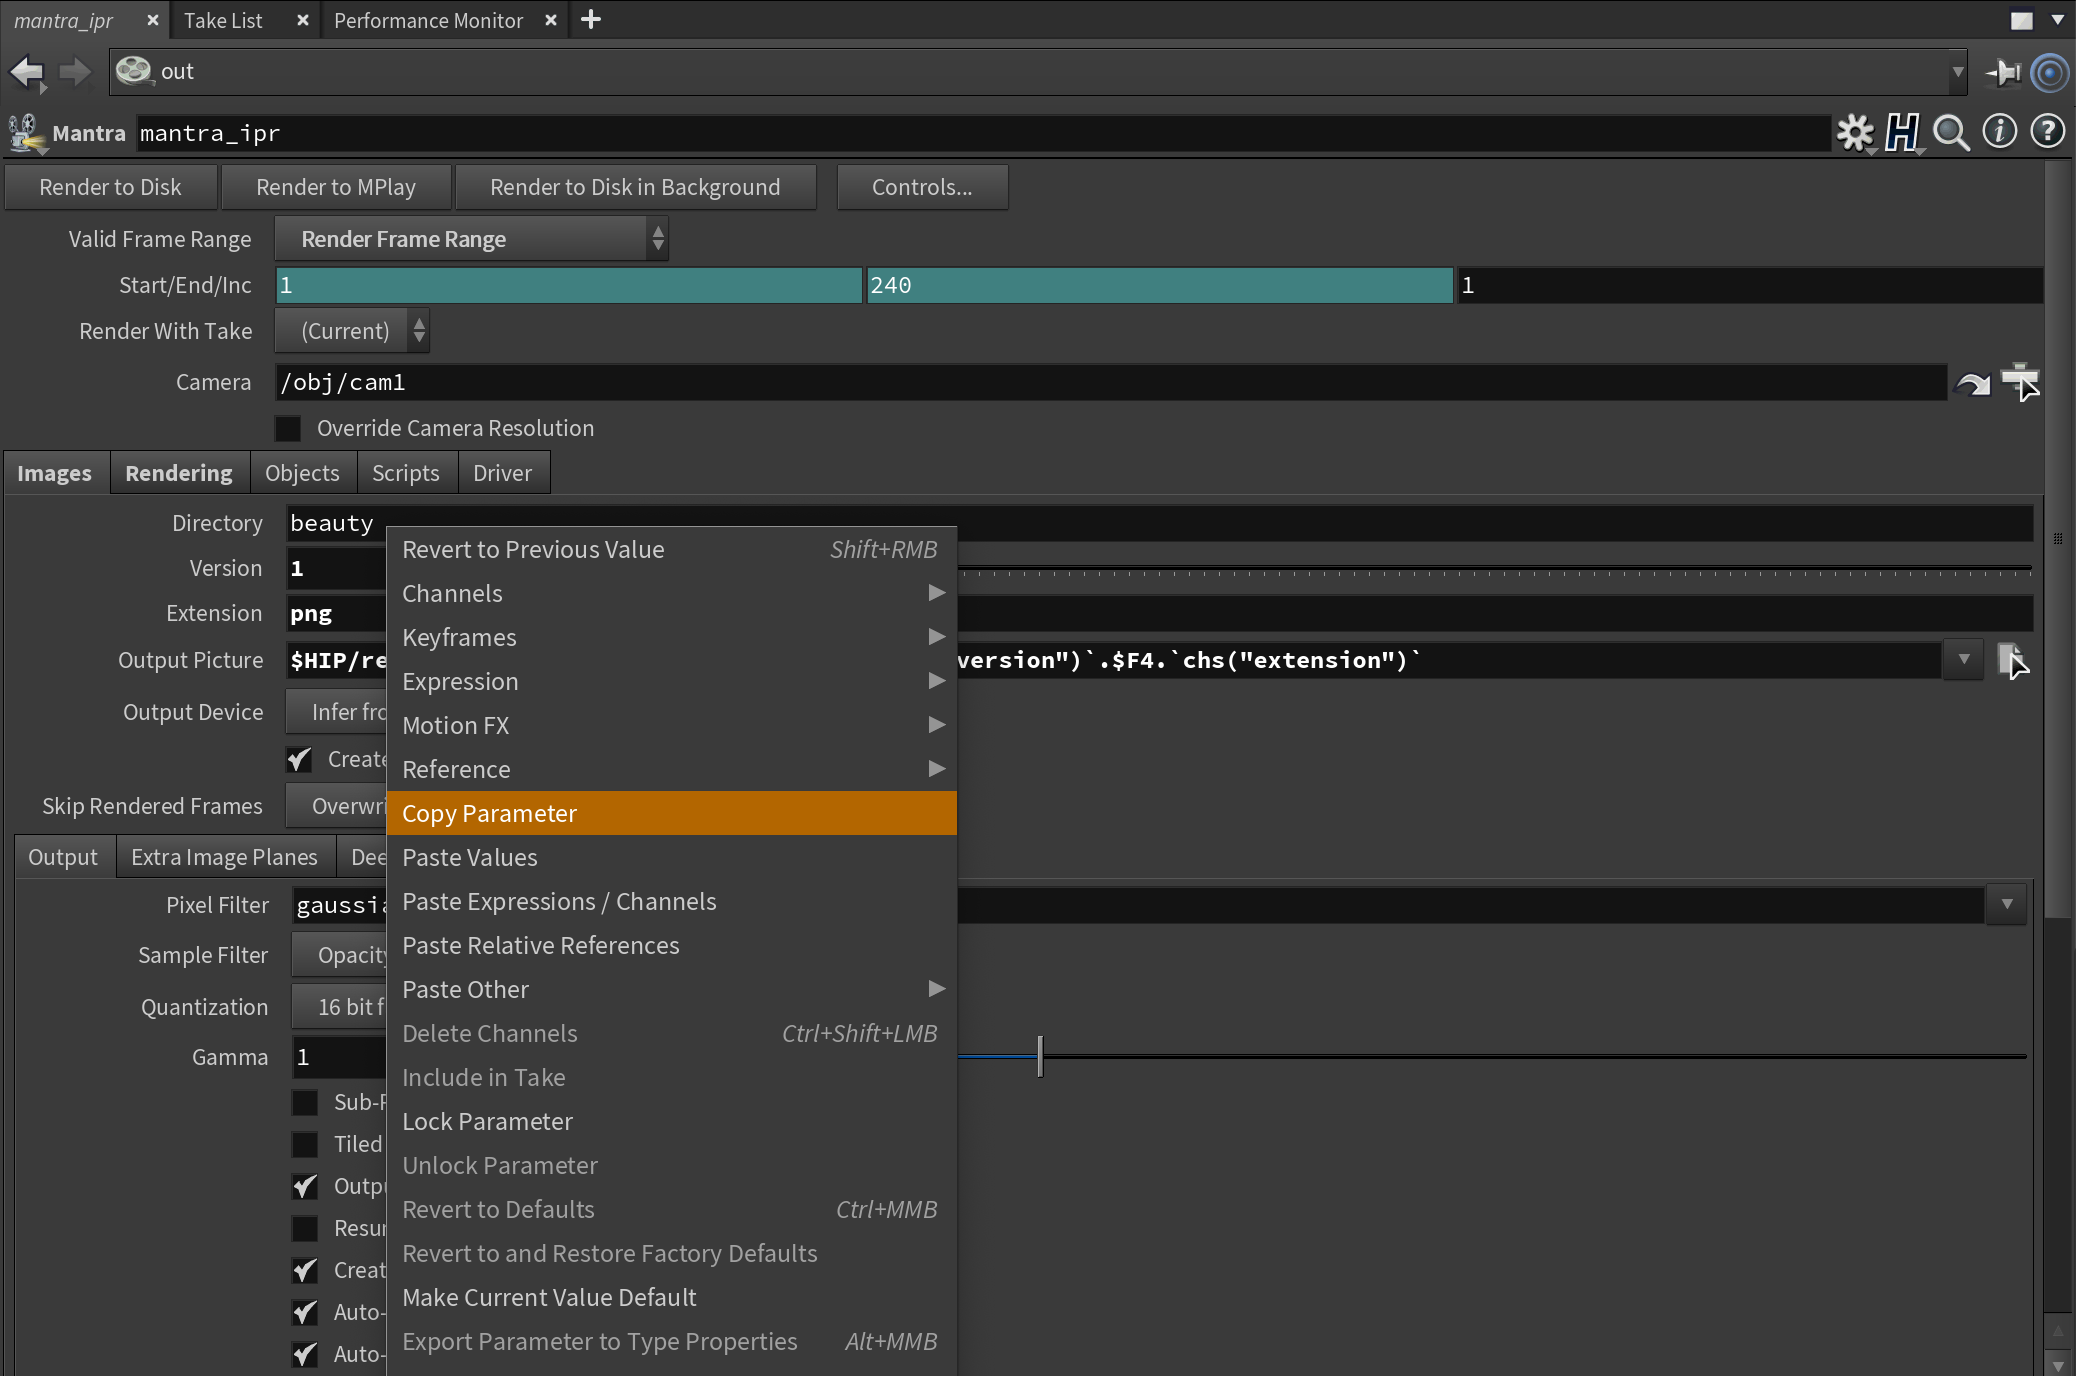
Next click inside the output field, at the point you want one of these fields to evaluate. Right-click and choose Paste Relative References. This will paste a reference to your custom field. Do this for each of your custom fields.
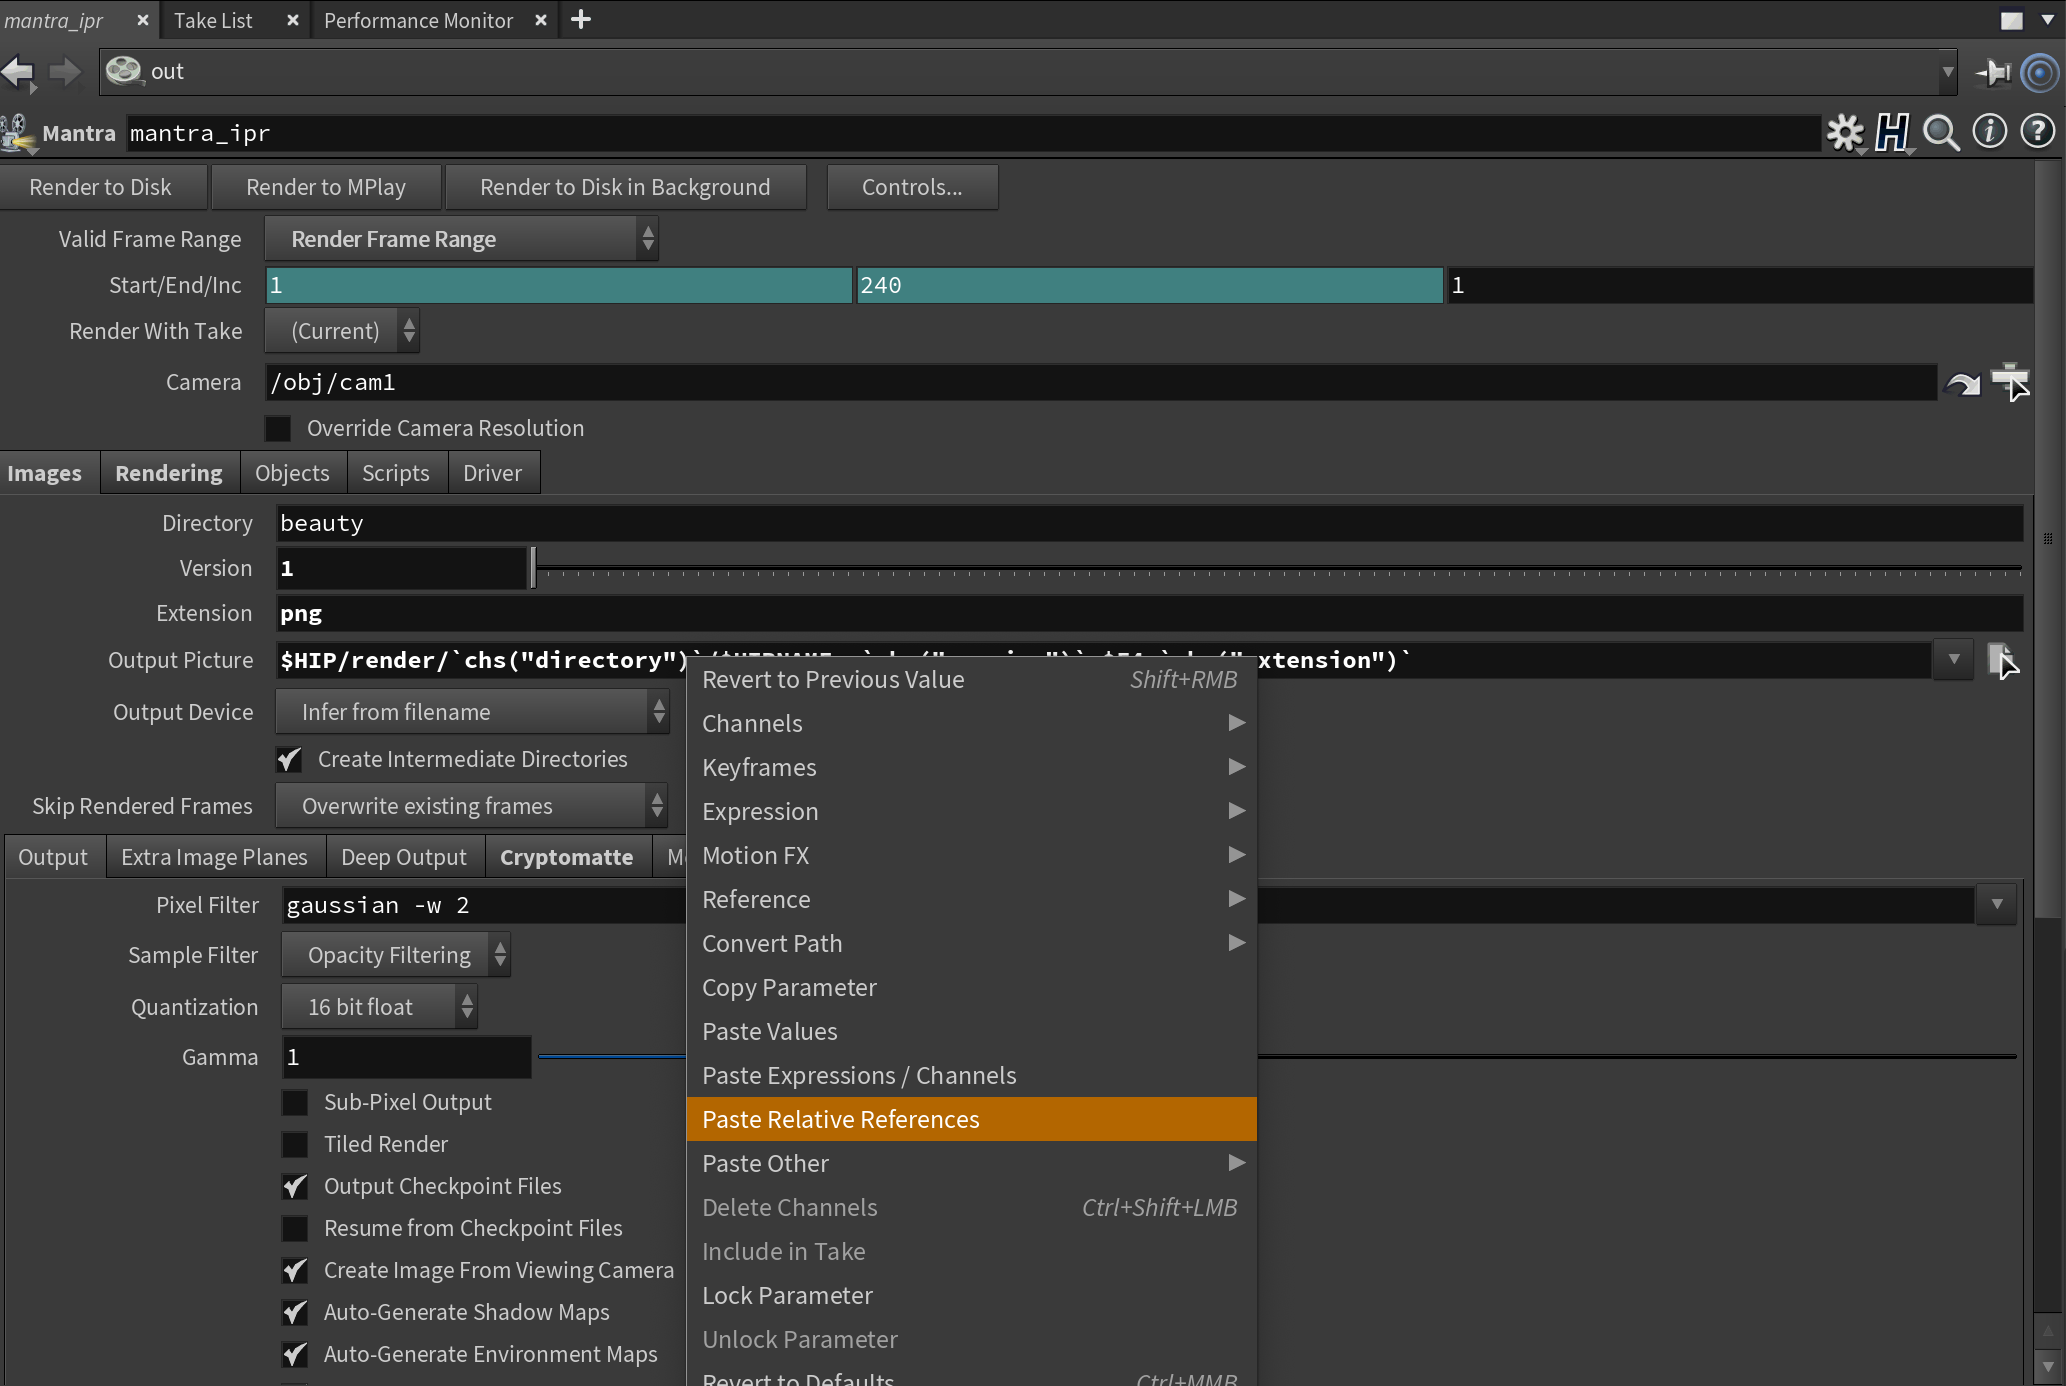
If you now middle-click on Output Picture, you should see how your custom fields will evaluate.
When you're happy click on the cog icon and choose Save Preset. Now whenever you want to bring this custom setting up, just click on the cog icon and you should see your preset there, ready to choose and load in.

One final tip. If you put $ACTIVETAKE into the new Directory field, it will create a directory based on the currently active take. I use this a lot when I'm rendering out different takes, to help keep things organised.